We all love our apples, they’re a versatile fruit with uses in many sweet and savoury applications.

Sometimes, particularly during “apple season” the abundance of fruit can seem overwhelming and we need some inspiration to help us know what to do to preserve the glut for times when we fancy some apples but they’re not in season! Obviously we offer the perfect solution with our apple pressing equipment hire  and our Juice for You service, or Community Juicing sessions but we all know that it is possible to have too much of a good thing!!

“In times past when my parents had a major glut of apples one year, my own method – before learning about Brendon Orchards – was to stew apples and freeze – they’d either then be used for fruit crumbles, combined with that other autumn “staple”, blackberries, or on their own – we were using that stash of frozen yummyness for a good 6 years!
Or I’d turn them into “apple cheese” – a preserve that is fab on toast, and, in my opinion, nicer than apple jelly.” 
Bex, Apple Press Manager (2014-2020).

Here we hope to fill this page with recipes and suggestions and would love you to send us your favourites – do use the form to share your culinary delights with us.Obviously we offer the perfect solution with our apple pressing equipment hire  and our Juice for You service, or Community Juicing sessions but we all know that it is possible to have too much of a good thing!!

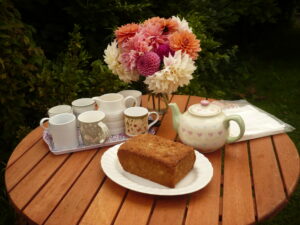
Somerset Applesauce Cake 

For the apple sauce:

    • 1 lb apples, prepared and roughly chopped
    • 1 oz granulated sugar

For the cake:

    • 4 oz butter/margarine
    • 6 oz caster sugar
    • 1 egg, beaten
    • 10½ oz self raising flour, plus half teaspoon baking powder
    • Pinch salt
    • 1 teaspoon Cinnamon
    • Half teaspoon each Allspice & Nutmeg
    • Quarter teaspoon ground cloves
    • 6 oz raisins
    • 3½ oz chopped walnuts

Method:

    • Oven 180°C, 350°F, Gas 4.
    • Grease and line a loaf tin
    • Make an apple sauce with the apples, granulated sugar and a splash (about a dessertspoon) of water. You want a rough, lumpy texture. It will cook further during baking.
    • Allow to cool completely.
    • Cream butter and caster sugar together to a light creamy consistency.
    • Add the egg (slowly incorporating it, so that it does not curdle).
    • Add the cooled apple. Mix gently but thoroughly.
    • Add the flour & spices, then the raisins and nuts when the flour is thoroughly combined.
    • Spoon into the prepared tin. Do NOT smooth the top – if it needs to settle, give the tin a sharp tap on the work surface.
    • Bake for 50 to 60 minutes. When it is cooked, it will ‘sing’ slightly, and the top will spring back when pressed lightly. The skewer test is unlikely to work, due to the moisture content.


The perfect cake to satiate your trusty apple-picking friends

A nice, easy cake that keeps well

Ingredients:

  • 225g wholemeal flour

  • 2 tsp baking powder

  • Pinch of salt

  • Grating of nutmeg or 1tsp mixed spice

  • 175g light soft muscovado sugar

  • 150g butter, melted and cooled

  • 2 large eggs beaten

  • 4 medium apples(preferably fairly tangy) peeled and diced

  • Demerara sugar, to top

  • 2 tbsp flaked almonds


Method:


Heat oven to 160c, grease a 20cm cake tin, put baking paper in the bottom.

Mix flour, baking powder, salt, spices and sugar well together in a large bowl. Stir in butter and eggs and beat together until well combined.

Stir in the apples, until well distributed, spoon into the tin, smooth the top and sprinkle with the Demerara sugar. Bake for an hour then sprinkle the almonds over the top and bake for about 15 – 20 minutes more until coming away from the side of the tin.

Allow to cool for 10mins in the tin then lift onto a rack and cool completely.


(For larger parties I use a 23cm tin and increase each ingredient by 50%,

e.g. 3 eggs, 225 g butter.
Simple Cider

Cider recipe sent by Jonathan Marshall, although he says he accepts no responsibility for your own end results!!

“My approach to making cider has always been to keep things as simple as possible, and over the years this seems to have worked out OK.

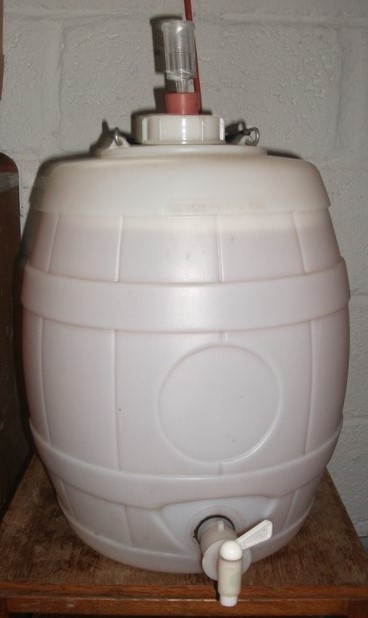
    • Once the juice has been pressed – using only cider apples, with a few dessert apples added to make up the quantity if required – it is put into pre-sterilised standard 5-gallon plastic home-brew barrels.
    • Usually the natural yeasts from the apple skins will start fermentation, but if it is slow to start or doesn’t start at all then you can add a sachet of Young’s cider yeast to each 5-gallon barrel. Usually give it round about a week before intervening with yeast, but that does depend upon the weather – the cooler it is the longer you’d leave it. It’s all a combination of instinct and experience.
    • In either case close the barrel with a cap incorporating an airlock.
    • Once fermentation has finished replace the airlock with an ordinary safety valve cap
    • Leave the cider to mature for at least a couple of months or preferably longer.
    • If the resulting cider is too dry for your taste the thing to do is to add a proportion of sweet cider from commercial producers of farmhouse cider, such as Rich’s or Torre or any other local producer. Blend until you have the right mix for you.

And that’s about it – as I said at the beginning, just keep it a simple as possible and you shouldn’t go too far wrong (all being well!).

Some people pasteurise the apple juice (or sterilise it with
Camden tablets) and then add cider yeast, but I have always thought that rather
a waste of time.”

Jonathans Cider in the fermenting stage with airlock fitted

Do you have a favourite apple recipe? Please let us know here: